
Think of all the emails you and your staff send to customers every day. Now think about turning each one of those emails into an opportunity to grow and improve your online presence. Sounds good, right? Read on to find out how.
If you joined us for our Harness the Power of Online Reviews HelpForce webinar, you’ll know that email signatures can be (and should be) a valuable part of your digital marketing plan. Making one simple update to your email signature can lead to better SEO, more customers and a chance to reflect on what your business does best and what you can improve on.
By adding a “Review Us!” link to your Google My Business listing or Facebook page in your email signature, you can drive customers to your listing to share their great experience with future customers.
Want to learn how to implement this incredibly beneficial marketing tool for your business? Here’s a helpful guide to get you started, plus a quick 10-minute video walkthrough of these steps!
Step 1. Access Your Signature
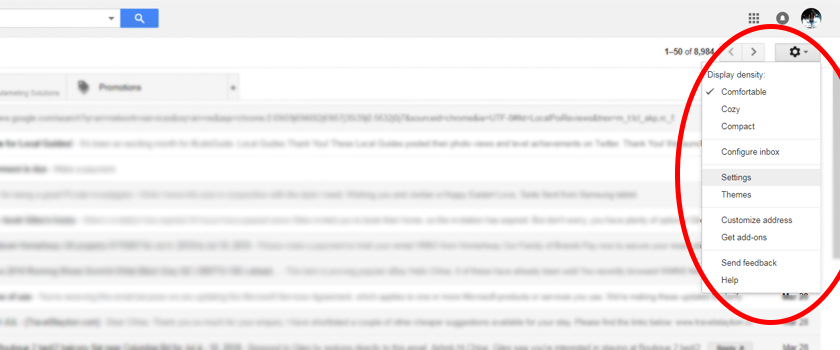
If you run or work at a business, chances are you have an email signature. Access your email signature on a desktop device to get started. For example, if you’re using Gmail, click the gear on the right-hand side and head over to your “Settings,” then scroll down until you see the “Signature” textbox.
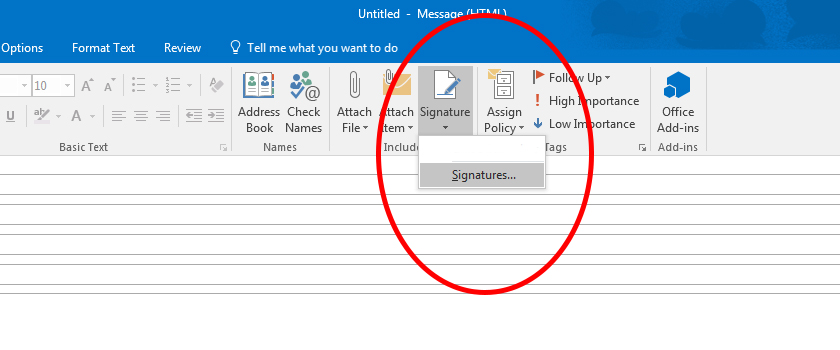
If you’re using Outlook, start a new message and click “Signature” and then “Signatures…”
Step 2. Choose Your “Review Us” Image
Decide if you want to send your customers to Google or Facebook. Then, choose the “Review Us” image that you want customers to click. This should be a small, colored image that stands out from the rest of your signature’s text and has a CTA (call to action) asking the customer to leave a review. You can find a lot of examples on Google Images, but to avoid any copyright issues we’ve created some example templates for you to use.


To use one of these images, simply right click and save the image to your computer. Do not copy and paste the image from the internet! If the website that hosts the image ever shuts down or deletes the image, your email signature’s image may disappear.
Step 3. Add the Image to Your Signature
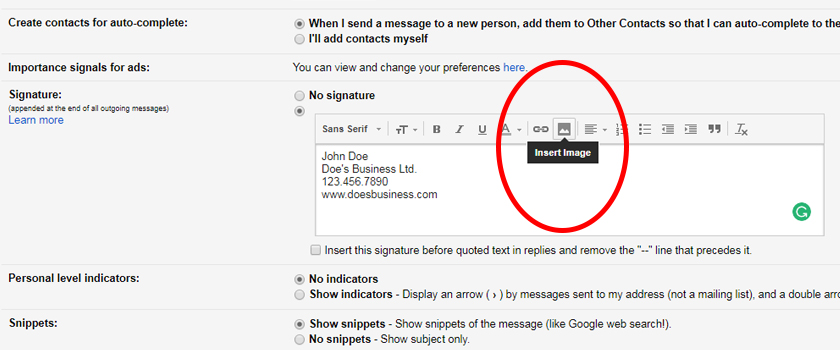
Click the “Image” icon button to upload the image to your email signature.
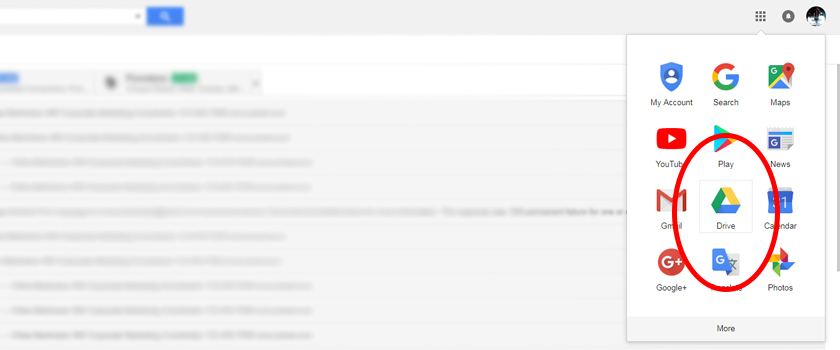
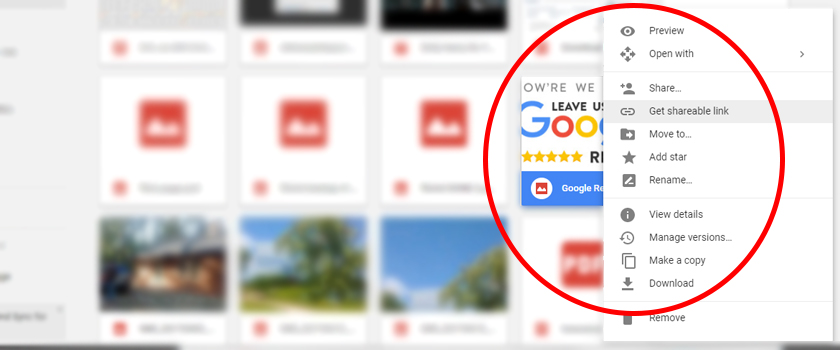
In Gmail, you’ll need to upload your image to your Google Drive and then right-click and select “Get shareable link” in order to make the image public. Then, click the middle square-shaped icon with a mountain illustration to upload your image from your Google Drive. See steps below.
- Select Drive from the Menu at the top right.
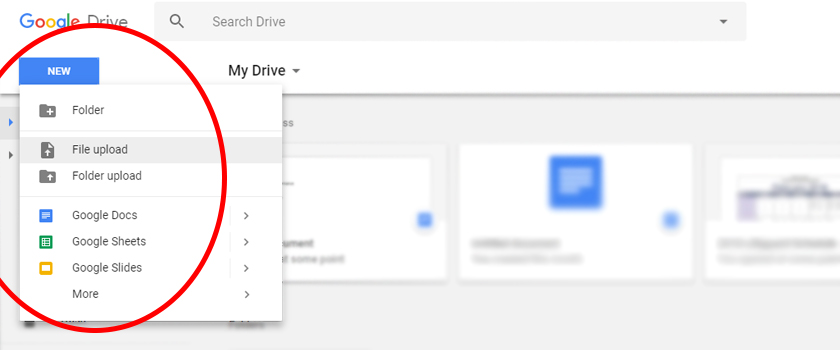
- Upload the file by clicking New > File Upload.
- Right-click on the image and click “Get shareable link” to make the image public.
- Head back to your email signature and add the image by clicking the middle square-shaped icon and selecting the image from your Drive.
In Outlook, simply click the far-right square-shaped icon with a mountain and computer illustration to upload the image directly from your computer.

Resize your image to be in line with the rest of your email signature.
Step 4. Link the Image to Your Review Listing
Open a new tab or browser and head over to your public Google My Business (GMB) listing or Facebook page. Access these by searching for the name of your business on Google or Facebook.
If you’re using Google, your reviews should show up at the top of your Google My Business listing directly under your business’s name.
- Click on your reviews link to access them.
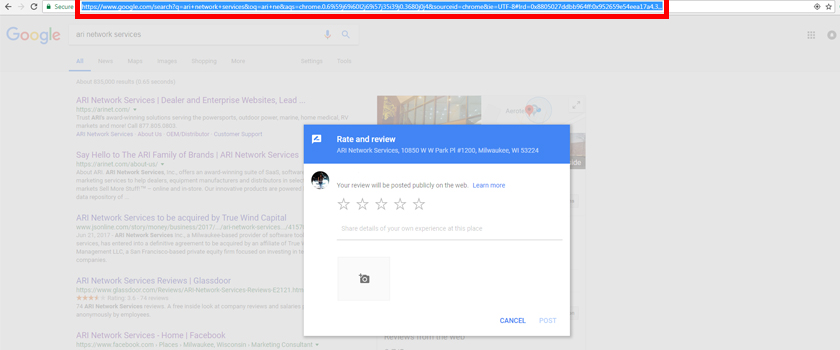
- Click the blue button in the top-right corner that says “Write a Review.”
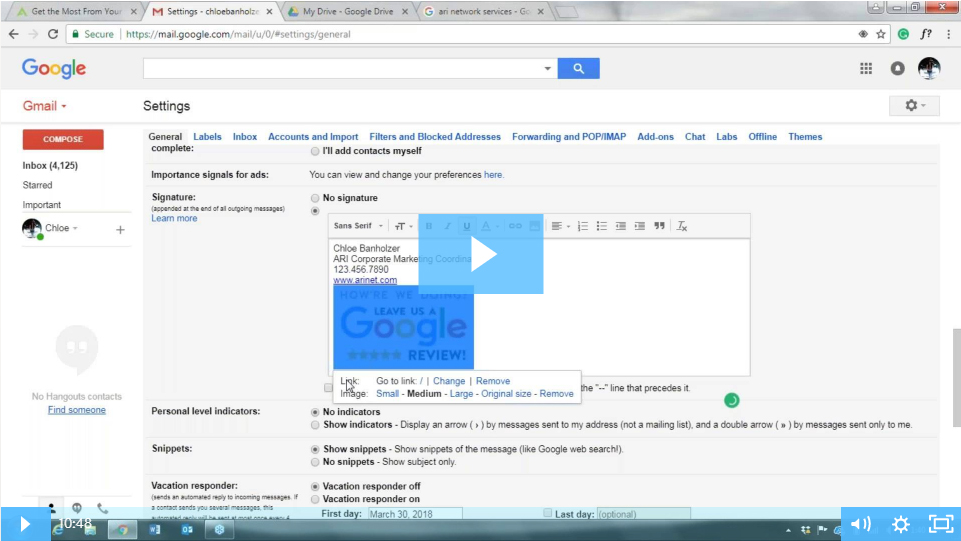
- A box should pop up asking you to either leave a review or sign in. Do not do either of these. Instead, copy the entire URL from the top bar.
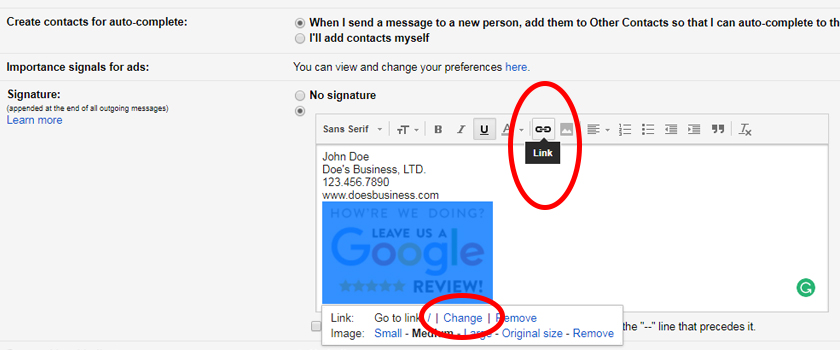
- Head back to your email signature and click on the “Review Us” image. After the image is highlighted, click on the “Link” icon button. Below the image, click to “Change” the link and paste the URL into the link web address textbox and click “OK.” In Gmail the link button is the middle chain-shaped icon:
Click “Save Changes” at the bottom of the page.
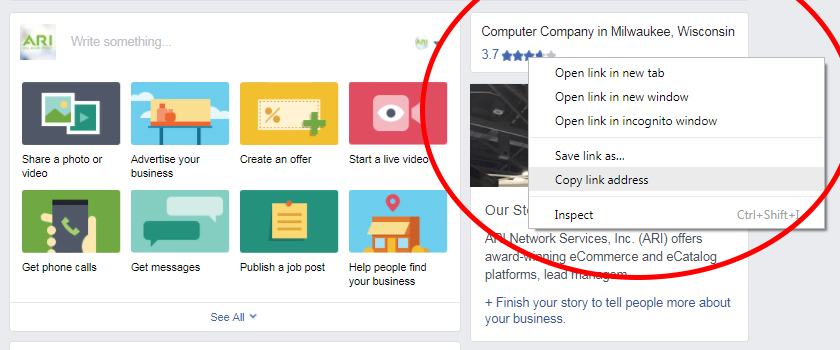
If you’re using Facebook, head over to your business’s Facebook page. You should see your company’s review average on the right side of your page.
- Right-click on your star rating and click “Copy link address.”
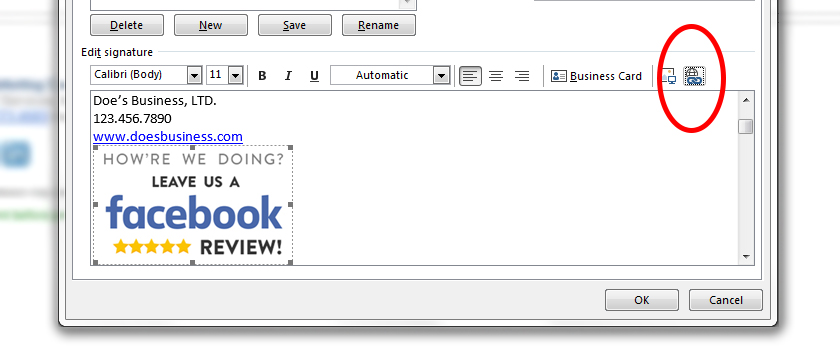
- Head back to your email signature and click on the “Review Us” image.
- After the image is selected, click on the “Link” icon button. In Outlook it’s the far-right globe and chain-shaped icon:
- Paste the URL into the link address box and click “OK.” Click “OK” again to save your changes.
Step 5. Test Your New Signature
Now that your new signature is saved, send a test email to a co-worker asking them to click on your new “Review Us” button. If they are on a desktop computer and click the Google review image, they should receive the same pop-up box asking them to either leave a review or sign in. If they are on a mobile device, they will be taken to the mobile version of your GMB listing. If they click on the Facebook review image, they should be taken to your company’s Facebook review section.
Check out ARI’s quick 10-minute walkthrough tutorial:
If you have any difficulty with any of these steps, please reach out to your ARI Digital Marketing Representative who will be able to further assist you!